
Last updated: October 22, 2026
Quick Answer: A first lash extension appointment usually takes 1.5 to 3 hours, and the process starts with a consultation before cleansing, taping, lash isolation, adhesive work, and curing while your eyes stay closed. For a first-timer, the real question is not just “What happens?” but “What will the appointment actually feel like from start to finish?” In this guide to How Lash Extensions Are Applied: Step-by-Step for First-Timers, the steps stay practical and specific.
What happens before the first lash is placed
However, the appointment begins with a short consultation and a look at your natural lashes, because the lash artist needs to choose a style that your own lashes can safely support. That first conversation usually covers curl, length, and fullness, plus any sensitivity history. Many studios also do a patch test 24 to 48 hours before the service if you have reactive skin or you have never worn lash adhesive before. According to the American Academy of Ophthalmology, professional guidance is important if you have eye-surface concerns or a history of irritation. (Source: AAO)
This is the stage where a beginner should speak up about contact lenses, eye irritation, recent eye surgery, or a tendency to rub the eyes. Those details matter more than a mood board. A lash artist is not guessing blindly; the choice of lash map, extension length, and adhesive speed depends on the condition of the natural lashes and the room conditions, including humidity and temperature.
Therefore, a generic article often skips the practical reason for consultation: it helps avoid obvious mismatches, and you should consult a professional about what your natural lashes can safely support. Very long extensions on weak natural lashes can look dramatic for a few days and then feel heavy fast. A full, dense style also takes longer to apply than a lighter set. If you want a classic look, the artist may choose one extension per natural lash. If you want more volume, the method changes.
If you are reading this because you want the bigger picture first, the parent guide to what eyelash extensions are fits right beside this one. This page stays on the application process itself, and the related guide to lash extension aftercare can help with what happens next.
How are eyelash extensions applied?
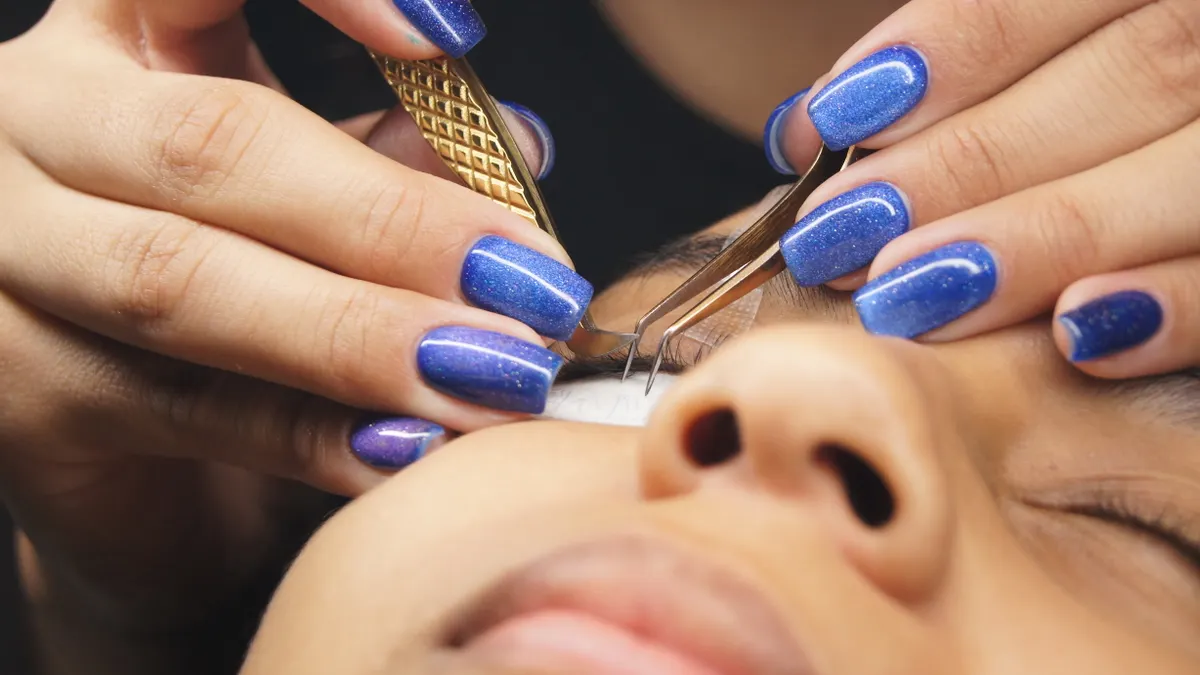
Eyelash extensions are applied one natural lash at a time with tweezers and lash adhesive, while the lower lashes are protected with eye pads or tape. The process is slow on purpose, because each extension has to be isolated before adhesive touches it. If you want a broader overview of the service, the related guide to lash extension styles can help you compare options before booking.
Here is the core procedure, step by step:
- The lash artist cleans the eye area and natural lashes. Oil, makeup, and debris are removed so adhesive can bond to a clean surface. A dry, clean base is the starting point for a set that holds properly.
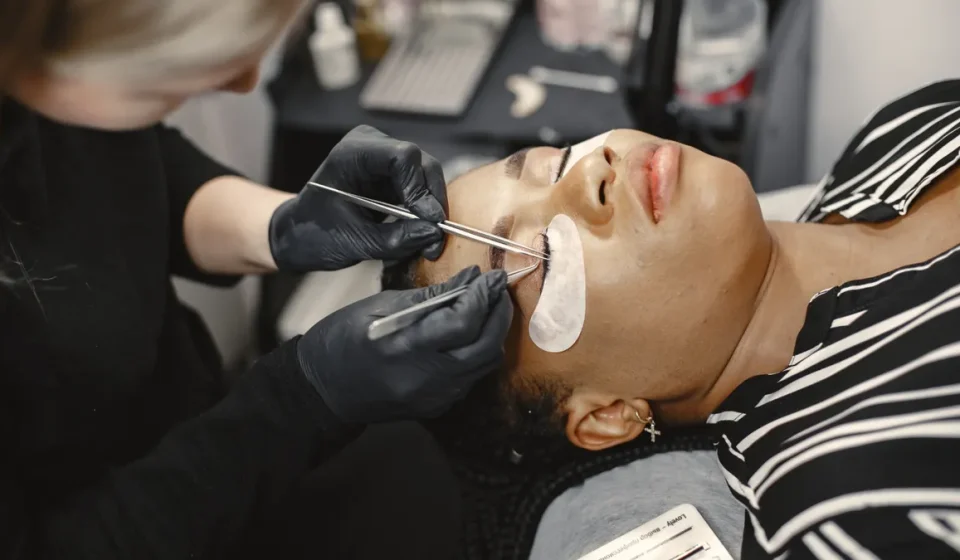
- Eye pads or under-eye gel pads are placed to cover the lower lashes. This keeps the bottom lashes out of the way and gives the artist a clear working area near the lash line.
- The artist separates one natural lash with two tweezers. This lash isolation step is the heart of the service, because one extension should attach to one natural lash, not to its neighbors.
- A single extension is picked up, dipped lightly into lash adhesive, and placed onto the isolated natural lash. The bond is made near, but not on, the skin. The extension should sit attached to the natural lash, not glued to the eyelid.
- The artist repeats the same motion across the eye, working in small sections. A classic full set may take about 1.5 to 3 hours depending on the style, the artist’s pace, and how much time is needed for isolation.
- At the end, the lashes are checked for stickies, which are lashes accidentally bonded together. The artist separates them before you open your eyes, so each lash can move freely.
The detail most first-timers miss is that the service is not “gluing fake lashes on top.” It is a precision process centered on separation. If isolation is sloppy, lashes can tug on each other as they grow out, which is uncomfortable and shortens the life of the set. The CDC’s eye health guidance is a useful reminder that anything irritating the eye area should be handled carefully. CDC
What isolation, adhesive, and curing actually feel like
Meanwhile, isolation feels like tiny, repeated taps near the lash line, not like pulling, and lash adhesive should not be touching the skin. Most of the appointment is quiet and still. You will usually be asked to keep your eyes closed for the entire service, because even a slight flinch can break the isolation the artist is building.
The adhesive is the part that sounds intimidating, but it is controlled in tiny amounts. A fresh drop is typically used during the appointment because lash adhesive begins changing as soon as it is exposed to air. The artist may work with different adhesive speeds depending on the environment; faster adhesives set quickly, slower ones buy a little more working time. That choice is one reason a trained lash artist matters.
So, curing is the final bond-setting stage. In practical terms, it means the adhesive has been allowed to finish setting so the lashes can be safely handled. Some studios use a nano mister or other finishing step, while others simply allow the adhesive to cure in place under their room conditions, and you should consult a professional about which method suits the adhesive system being used. The exact method depends on the adhesive system, not on the customer’s preference alone.
Consequently, a common mistake in beginner explanations is to treat curing like a dramatic event. It is usually not. It is more like the invisible last step that decides whether the set feels secure. If the adhesive is undercured, lashes can feel tacky or unstable. If the environment is too dry or too humid for the adhesive being used, the bond can behave differently than the artist expects. That is why professionals pay attention to room conditions instead of assuming one glue works the same everywhere. For adhesive safety and ingredient awareness, the U.S. Food and Drug Administration’s cosmetic labeling guidance is a useful external reference. FDA
What the appointment feels like from your side
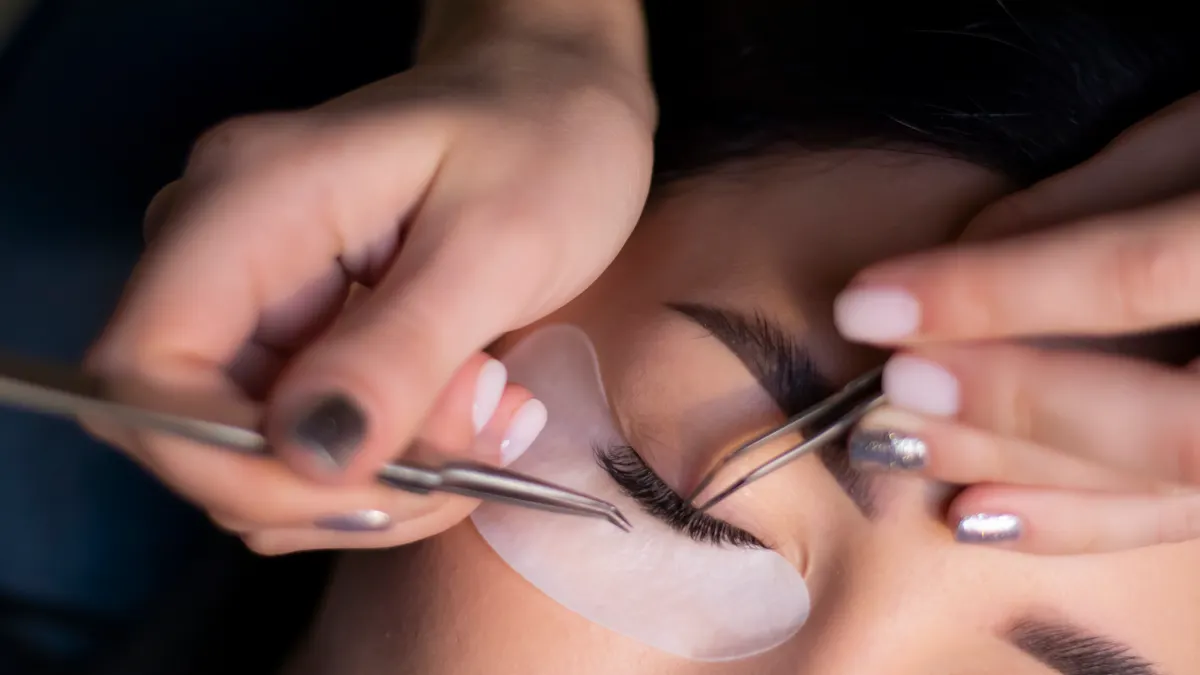
Therefore, the appointment feels like lying still with your eyes closed while someone works close to your face for 60 to 180 minutes. That is the most honest description. The sensation should be boring more often than dramatic.
You may hear tweezer clicks, the soft tap of tape, and the occasional instruction to relax your forehead or lift your chin slightly. Some people feel mild coolness from eye pads, and some feel very little beyond the need to stay still. If adhesive fumes are noticeable, the artist may adjust positioning or ventilation, but the service should not feel sharp or burning. If it does, say so immediately.
This is also where first-timers get surprised by how little movement matters. A cough, a laugh, or a long conversation can slow the artist down because isolation has to start over when lashes shift. The eyes stay closed the whole time, and the lids should not be forced open to check progress.
In contrast, many people bring nothing but patience and maybe an audio book. The trade-off is simple: more dramatic sets usually take longer and require more isolation. A lighter, natural look can be faster and feel less dense during application. If you are someone who hates being still for long stretches, that matters more than the style photo you picked. A classic set with moderate fullness is often easier for a first appointment than an ultra-full volume look.
Refill vs full set: what changes in the application process
A refill is a maintenance appointment that replaces grown-out or shed extensions; a full set is the original application on clean, bare natural lashes. That difference changes both the amount of work and the way the artist approaches the lashes.
With a full set, the artist starts from zero. Every visible extension is applied during that appointment, so the lash map, density, and symmetry are built from the ground up. With a refill, the artist first checks what remains, removes outgrown extensions as needed, and fills gaps with new ones. The refill process is faster because not every lash needs to be touched, but it is also more dependent on the condition of the existing set.
Before you book the wrong visit, this matters because you do not walk into a refill by accident. You need the first full application before the maintenance cycle makes sense. If too many extensions have shed or grown out, the artist may recommend a new full set rather than trying to patch a tired one. That recommendation is not upselling by default; it is often the cleaner way to restore balance.
There is also a practical limit to how much can be refilled. If the remaining lashes are sparse, twisted, or stuck together, the artist spends time fixing old issues before adding new extensions. That can make a refill feel less efficient than expected. A better rule is to think of a refill as preserving a good base, not rescuing a neglected one.
The mistakes that make lash extensions feel wrong
Therefore, the biggest mistakes are poor isolation, too much adhesive, and choosing a style that is heavier than your natural lashes can carry. Each one has a cost, and each one has a better alternative.
Poor isolation creates stickies. One extension bonds to more than one natural lash, and then every growth cycle pulls at the others. That can make the set feel tight or itchy. The fix is simple in theory and painstaking in practice: the lash artist has to separate every lash before moving on.
Too much adhesive creates a bulky bond. A heavy adhesive bead can look messy and may make the extension sit awkwardly on the natural lash. The better approach is a tiny, controlled dip, not a generous coating. Lash adhesive is a precision product, not something to dab on like mascara.
In particular, choosing a style that is too heavy can shorten comfort. Very long or dense extensions put more load on the natural lash and can look impressive for a photo while feeling like too much later. A conservative first set is usually a smarter starting point if you have fine natural lashes or you are unsure how sensitive your eyes are.
A fourth mistake is talking yourself into a bad fit because the style looks good on someone else. Eye shape, natural lash strength, and daily habits all change the result. A first-timer who wants the least risk should ask for a shape that can be adjusted after the first wear, rather than chasing the most dramatic map on the menu. For more on choosing a suitable look, the related guide to lash extension mapping is a useful next read.
What a good first appointment should leave you with
Ultimately, a good first appointment should leave you with lashes that feel light, look separated, and sit comfortably along the lash line. You should not feel obvious pulling, and the lashes should not be glued together in visible clumps. The result is not just “more lashes.” It is controlled placement.
Look for symmetry first. Both eyes should read as balanced, even if they are not perfectly identical. A strong first application also respects the natural lash line instead of starting too close to the skin or crowding the inner corners. If the artist talks through the plan, uses clean isolation with tweezers, and adjusts the map when your natural lashes call for it, that is usually a better sign than simply chasing the fullest possible look.
The first set is rarely the flashiest one. It is the one that gives you a usable baseline. From there, the next appointment can be adjusted toward more curl, more fullness, or a softer look once you know how your eyes respond.
Key takeaways
- The lash extension application process is slow because every extension is attached to one natural lash with careful isolation.
- Expect a consultation first, then cleansing, eye pads, tweezers, adhesive work, and a final check for stickies.
- The eyes stay closed during the service, and most of the appointment is quiet rather than uncomfortable.
- A full set starts from bare lashes; a refill fills in an existing set and depends on how well the old work has held up.
- A cautious first style is usually smarter than the most dramatic one if you want comfort and a cleaner result.
Does it hurt to get eyelash extensions?
No, it should not hurt. You may feel pressure from lying still, a cool sensation from the eye pads, or mild awareness of the tweezers near the lash line, but sharp pain is not normal. If you feel burning, pinching, or stinging, tell the lash artist right away so they can check the adhesive, placement, or room conditions.
How long does a lash appointment take?
A first full set commonly takes about 1.5 to 3 hours. The exact time depends on the style, how many natural lashes you have, and how quickly the lash artist can isolate each lash. Refill appointments are usually shorter than a full set because fewer extensions need to be applied.
Do you keep your eyes closed during lash extensions?
Yes, your eyes stay closed the whole time. Closing the eyes keeps adhesive fumes and tools away from the eye surface while the lash artist works with tweezers and eye pads. You may be asked to relax your forehead and keep still, but you should not open your eyes until the artist says the service is finished.
Drafted with AI; not yet reviewed by a person.